


Chocolate babka
Chocolate babka
In fall, I like to make sure there’s always something sweet in the kitchen to enjoy with an afternoon coffee.

I grew up on a farm in a breathtakingly beautiful corner of the Scottish Highlands. But, like most teenagers, I didn’t care. I plastered my walls with posters of Paul Nicholls, Ant and Dec, and other questionable heartthrobs, and planned which haircut was most likely to irritate my mum. There was nothing exciting to me about the view, or the red kites, or knowing all the neighbors. I just wanted to move to the city. Now, more than 20 years and seven cities later, I’m predictably weary of the city, and I long for that gentle life again.
After leaving home, I never had a garden and barely managed to keep a solitary plant alive. I told myself this was because, as a baker, I was better at subjecting things to force and heat than bringing them to life. When my husband and I moved in together, our apartment was tiny but it had a balcony. And so in early spring, we sat outside, nestling seeds into starter pots, cold fingers pressing them into the soil.
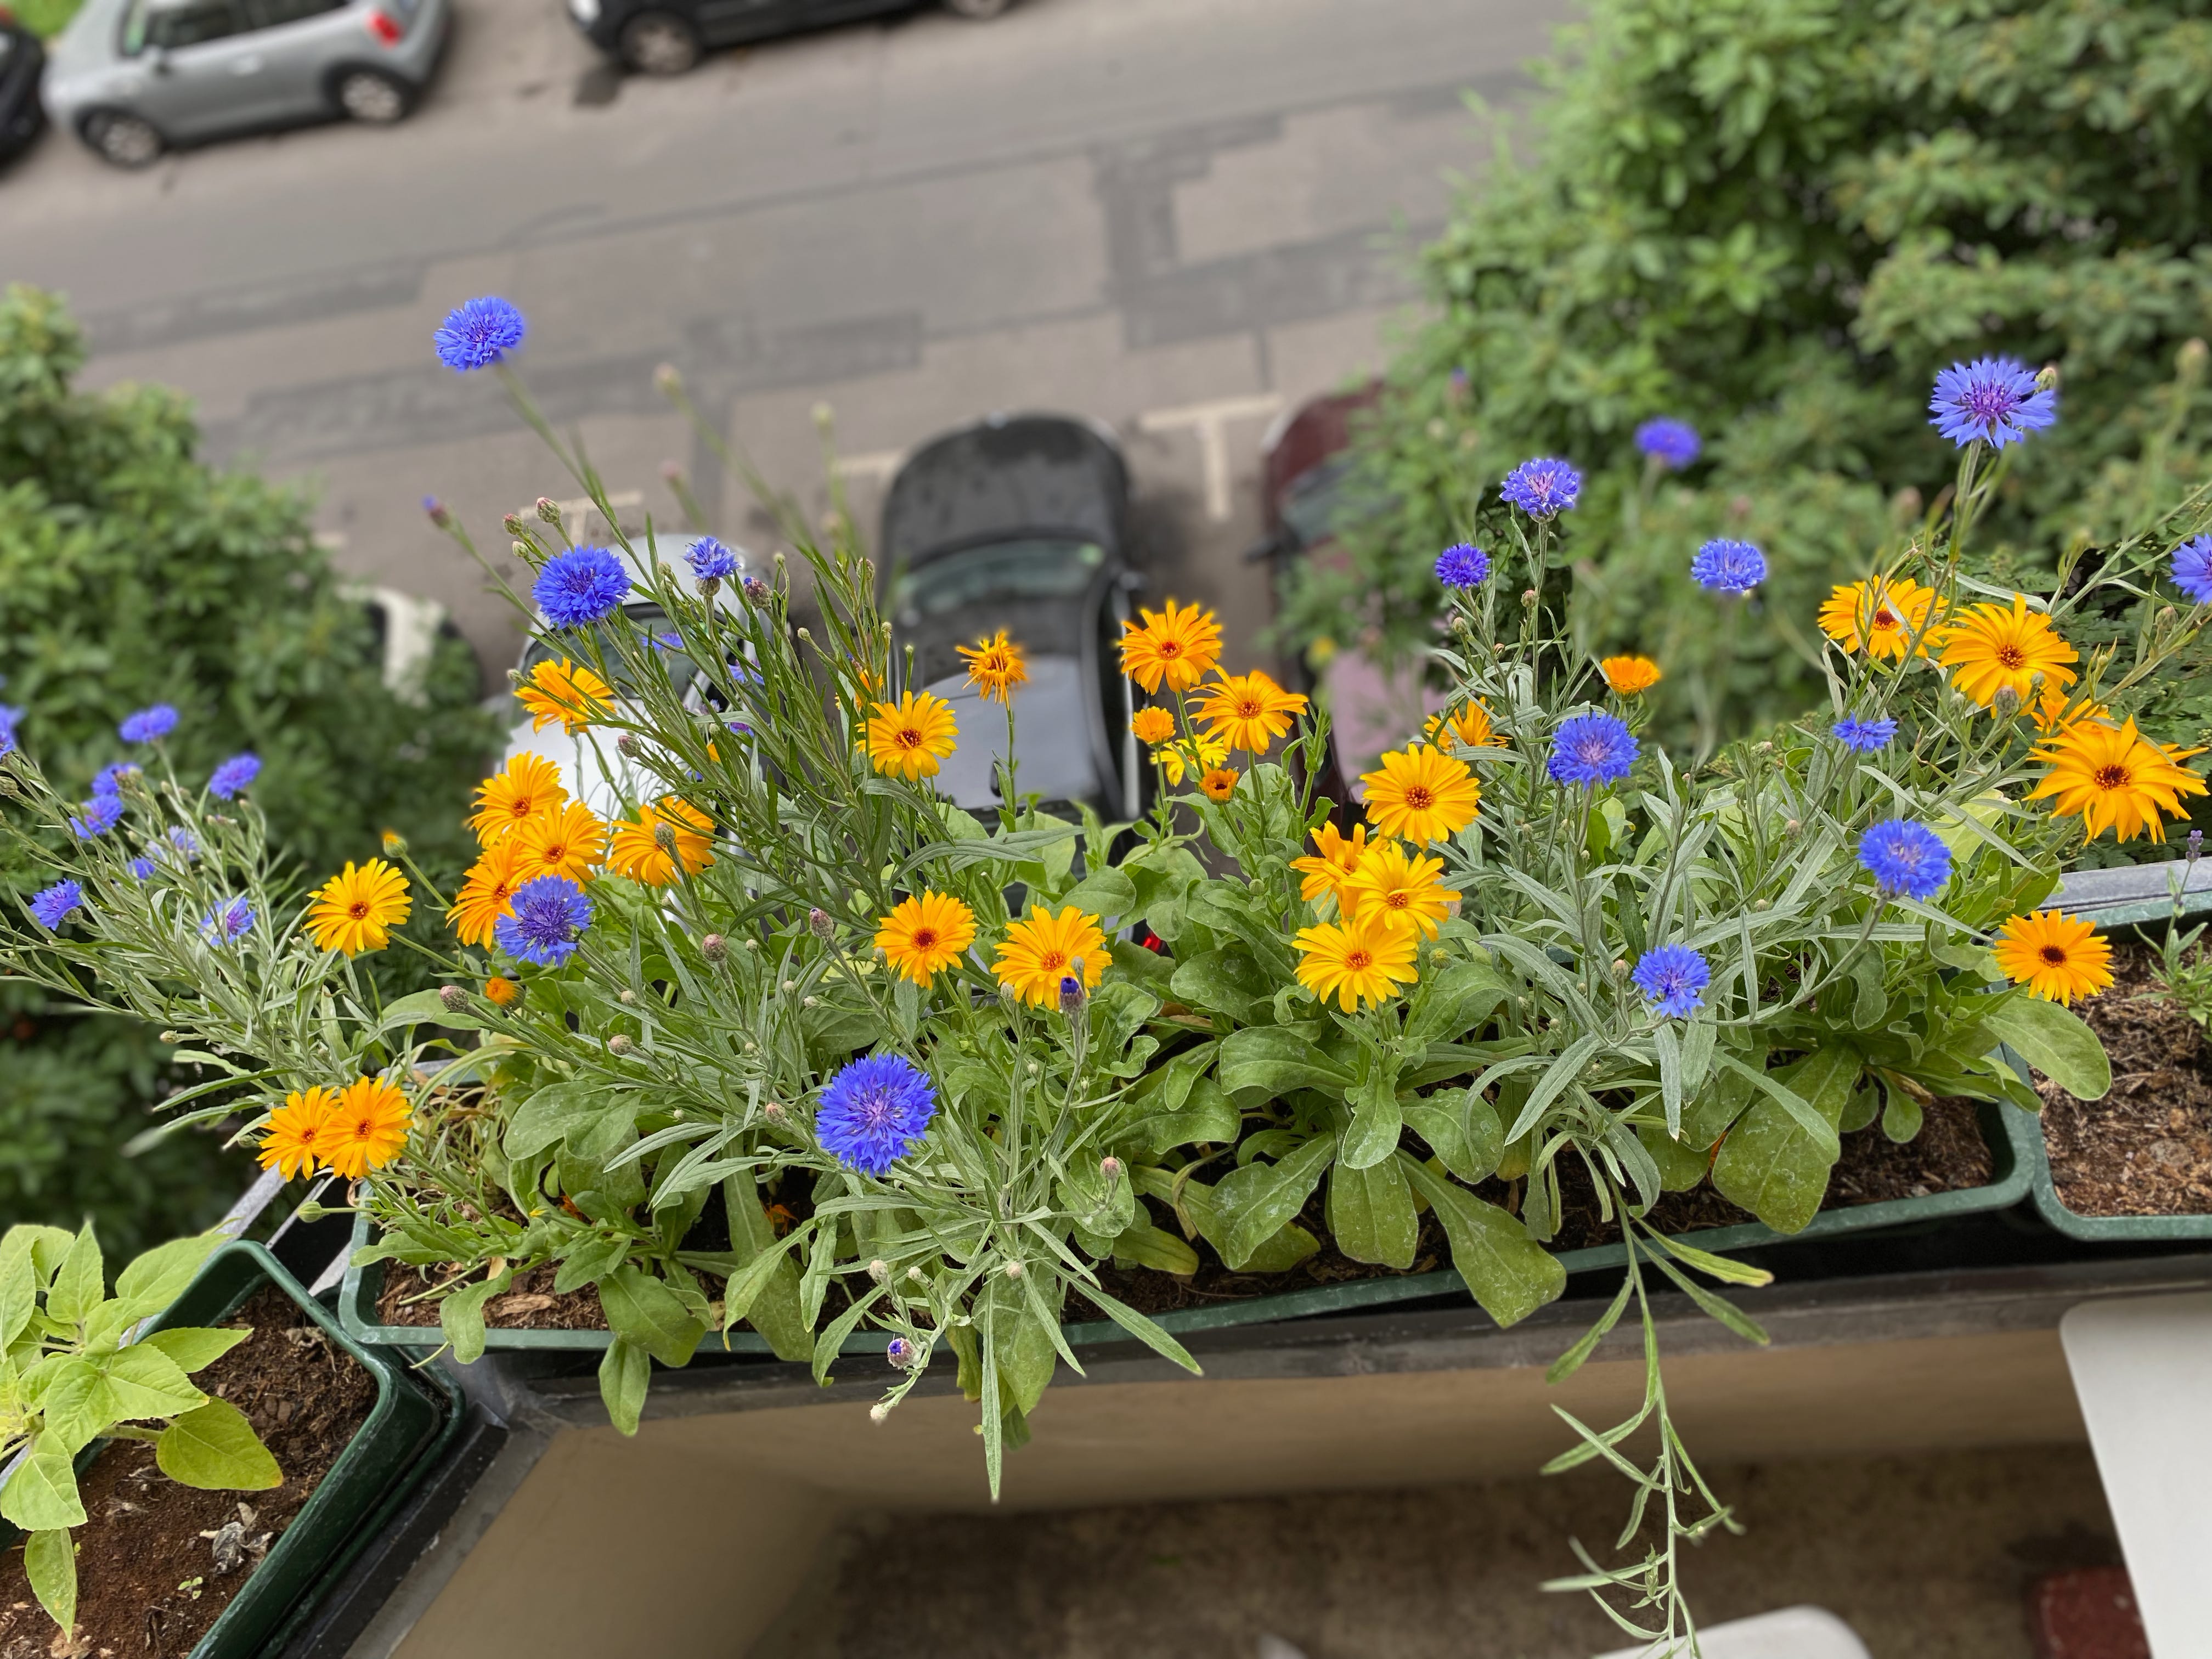
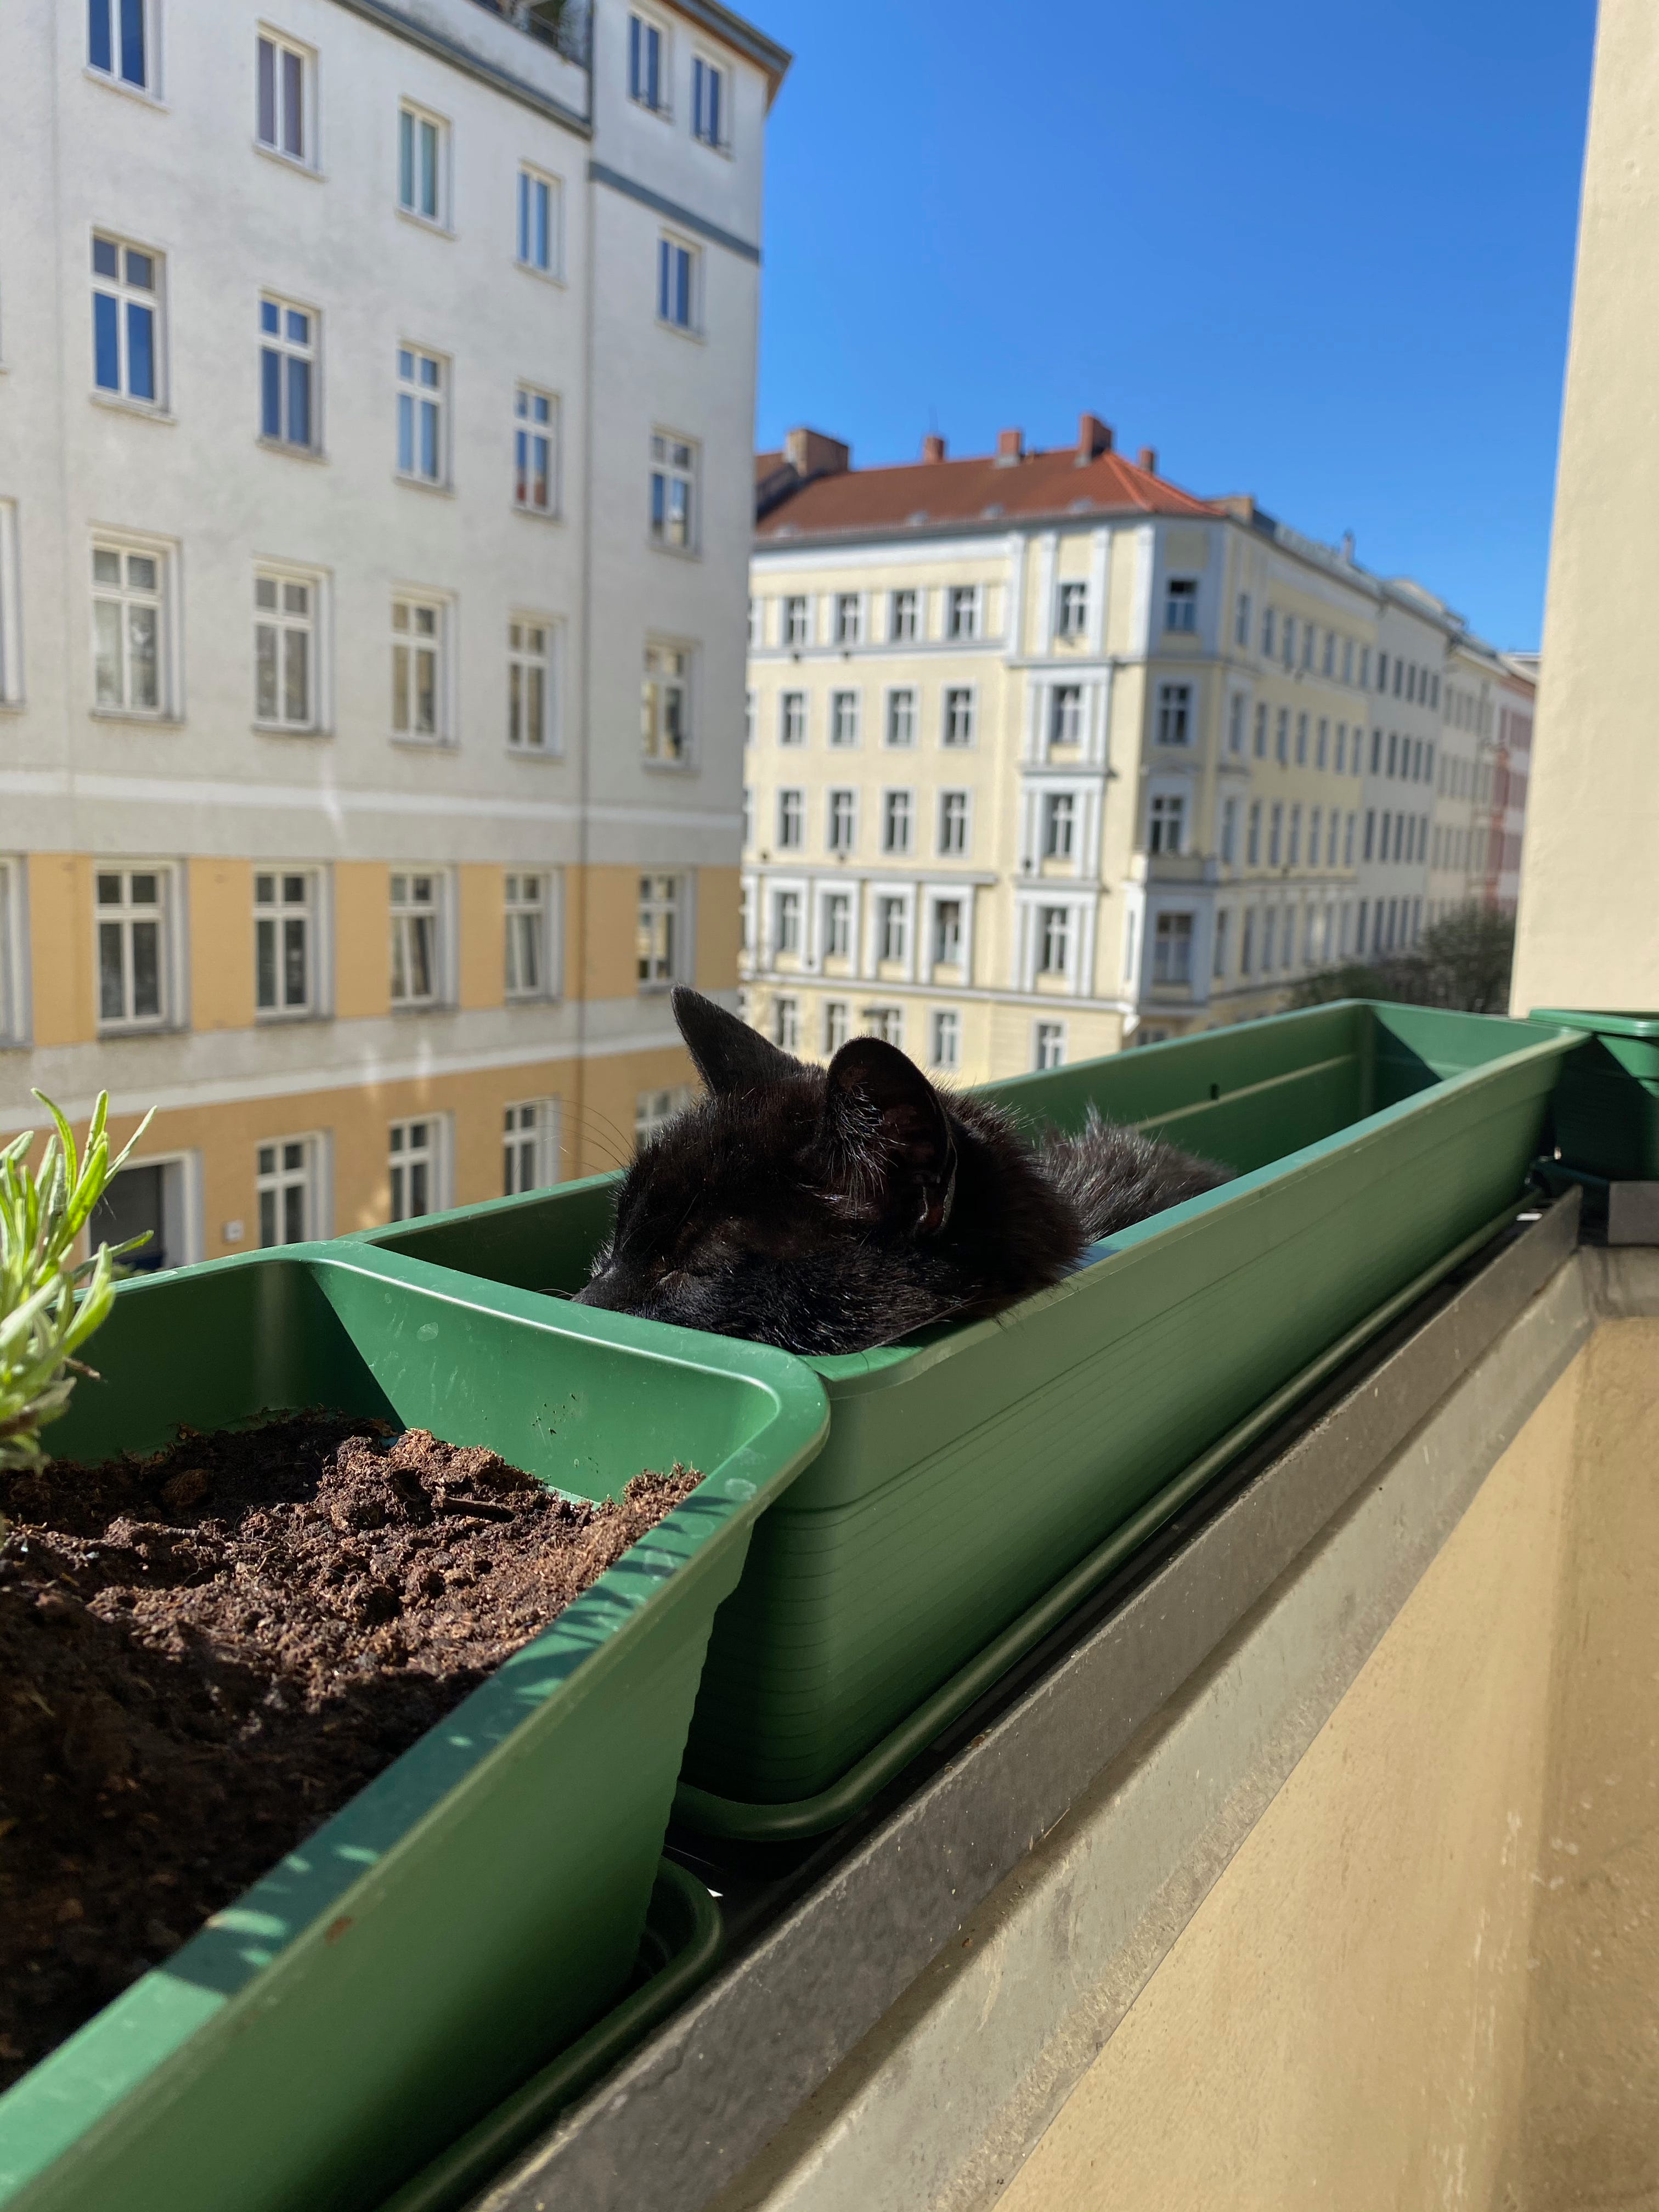
That first year, we grew sunflowers, tomatoes, lavender, cornflowers, and calendulas. It was the summer of 2020, and having a private outdoor space was precious. There was a lot of life on that balcony: bees, ants, aphids, goldfinches, wasps, and the occasional pigeon. The cats would squeeze themselves between the planters (and sometimes in the planters) for a sun bath. We ate breakfast out there before it got too hot, and dinner when the sun had gone down behind the building opposite. When fall set in and the plants died, we cut everything back, collected the seeds, and retreated indoors to wait for the light to return.
I dream of a garden, tendrils and stems, wild and fragrant. I hope for a vegetable patch, a herb garden, a small orchard. I’d love to be able to spend an afternoon harvesting for dinner, planning the menu as I go, and to fill a pantry with preserves—grand ambitions for someone whose experience extends to a couple of planters. But for now I have to make peace with poor air and sirens that are too loud. I’ll do what I always do to make something bearable: cook and bake and take long walks. I’ll look out for red squirrels, and crows trying to break into the shell of a wild hazelnut. I’ll pay attention to how flowers go to seed, and look for the hops growing all over the city. I’ll make soups and bake pies, and make sure there’s always something sweet in the kitchen to enjoy with an afternoon coffee.

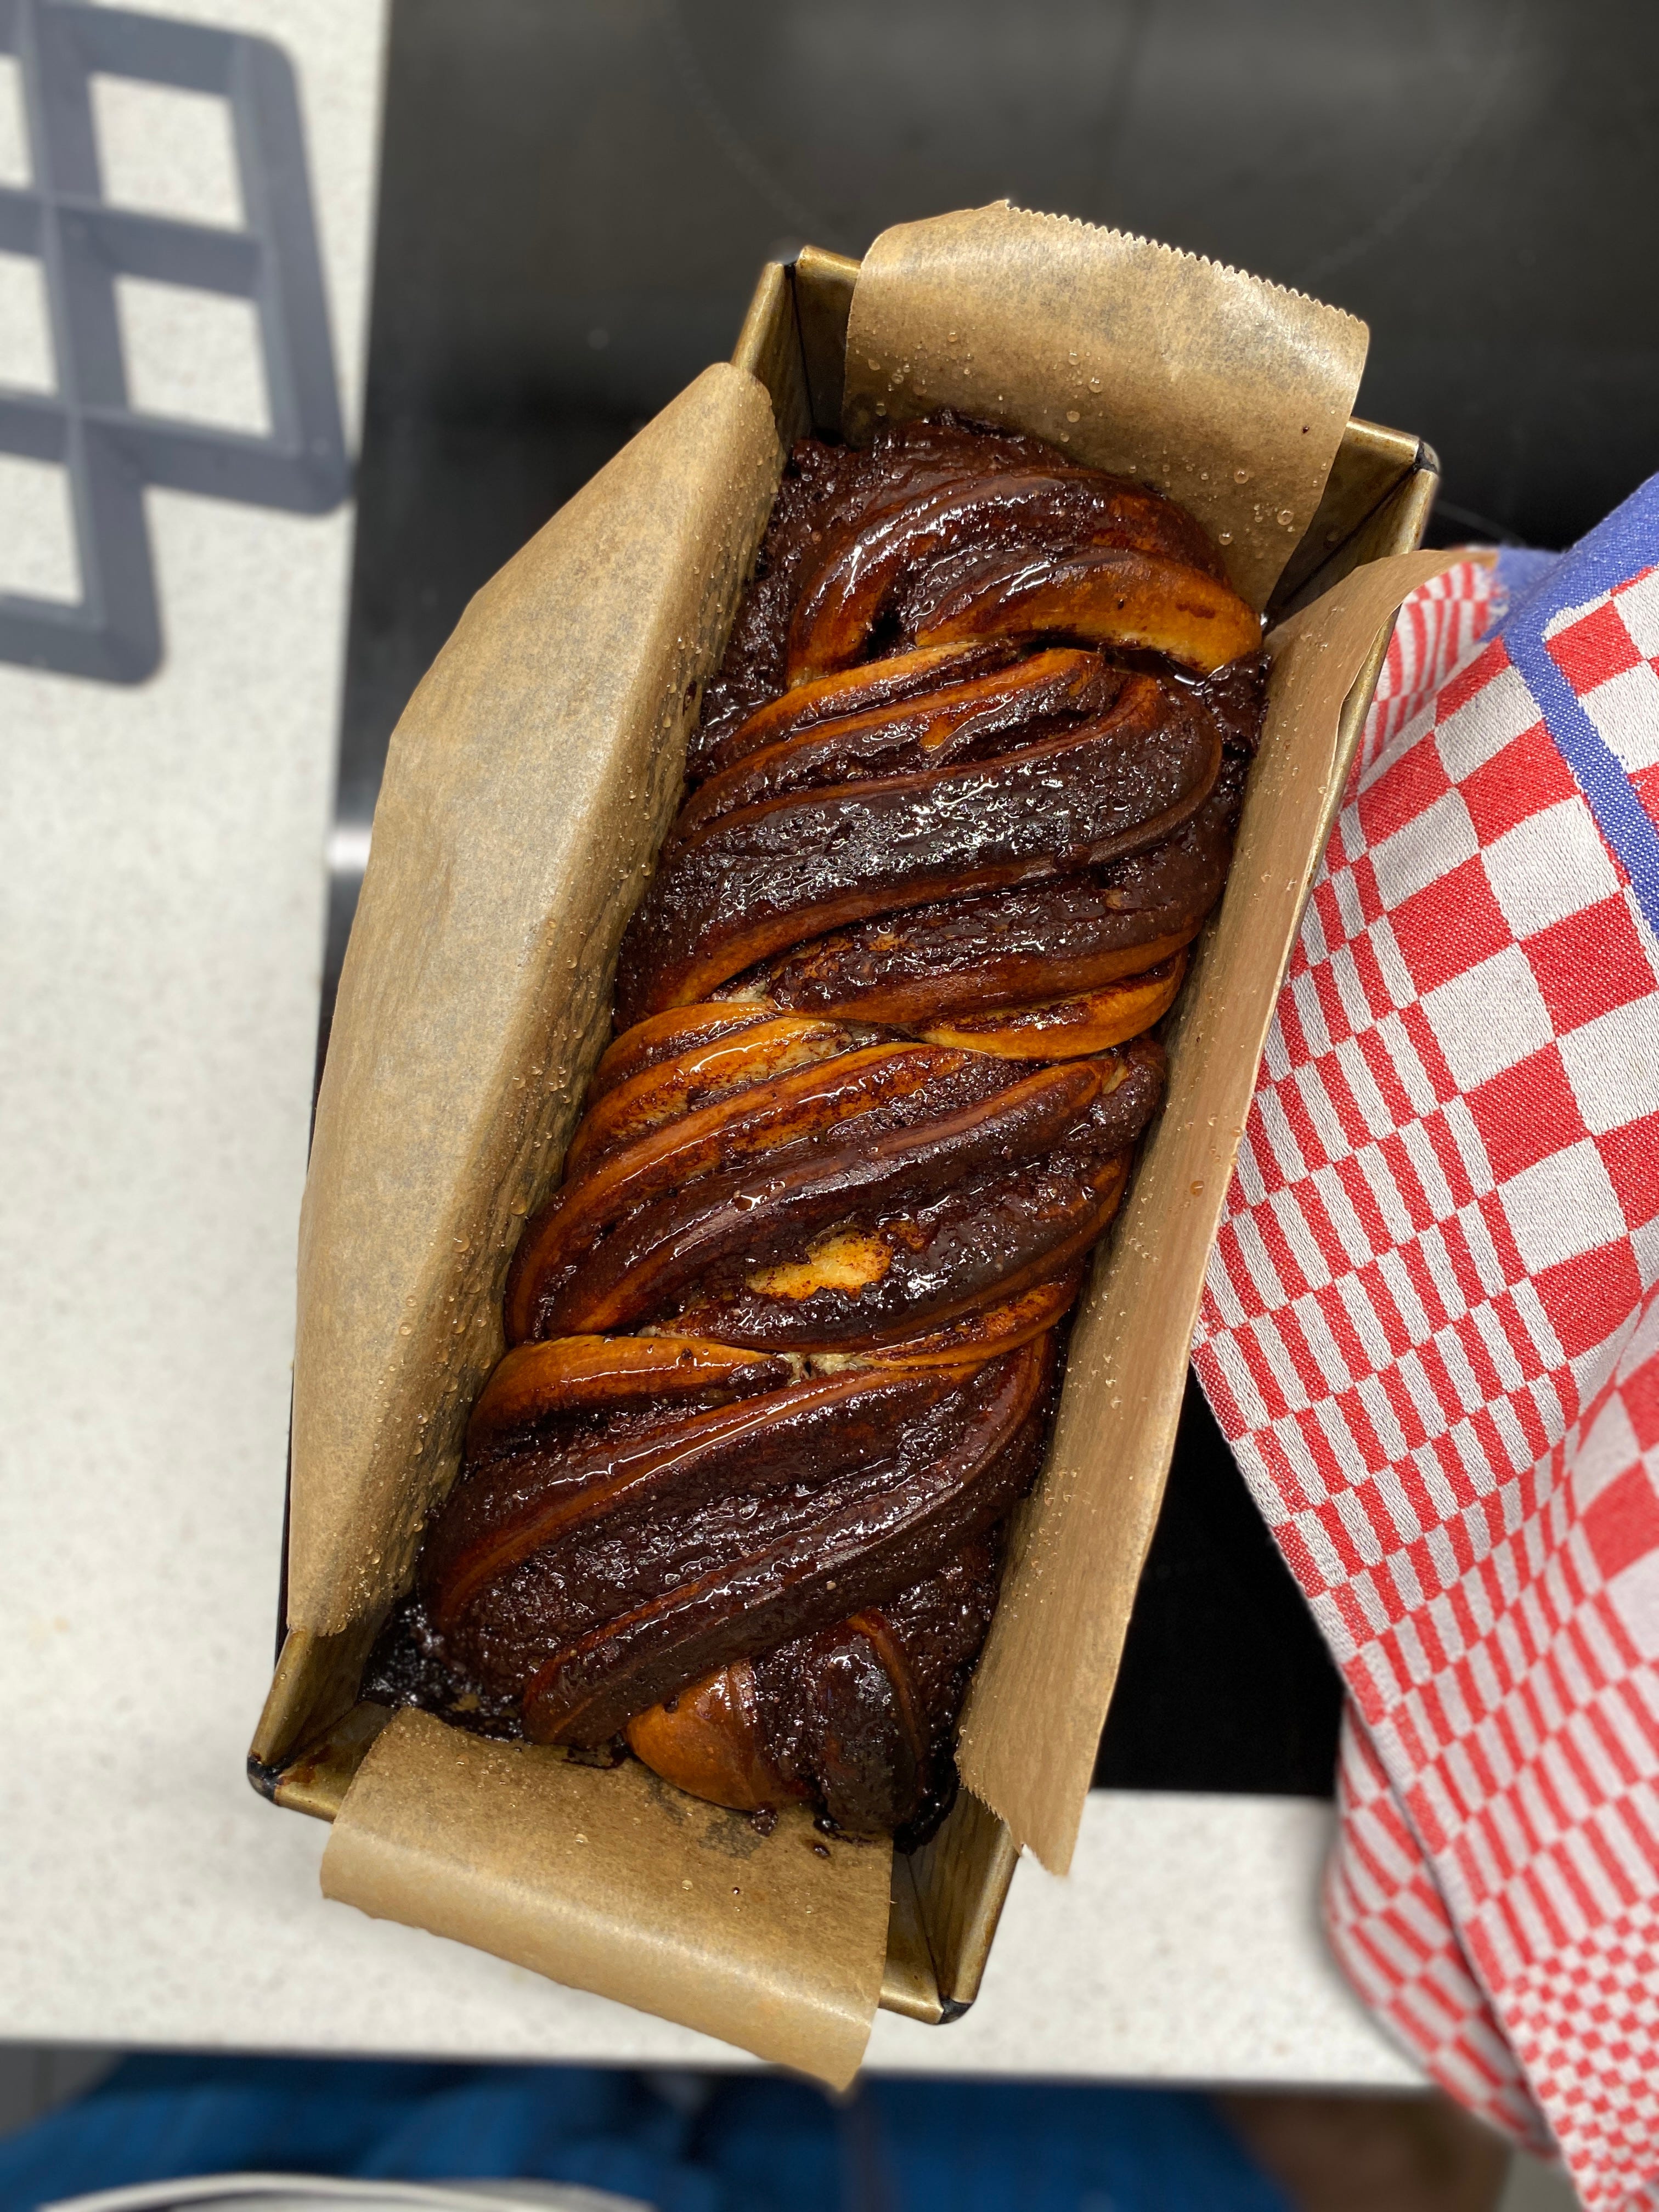
If you aren’t familiar with it, babka is a yeasted cake, usually filled with chocolate (my preference) or cinnamon. Though the cake itself isn’t very sweet, it’s doused in sugar syrup immediately after coming out of the oven. The syrup oozes down through the cake, spreading sweetness throughout, and helping to preserve the softness. Though babka is best enjoyed fresh, it keeps rather well in an airtight container and can even be toasted and spread with butter.
This recipe should be made by hand, and that requires a bit of elbow grease. Adding the butter will be very messy, but trust me, it will come together. Make sure the ball of dough has picked up all that’s stuck to your counter before adding more butter. If you’d like to make the dough in a stand mixer, I’d recommend making a double batch. Your mixer will have a hard time with the quantities for just one cake, and you’ll likely wind up over-kneading. Be sure to start the dough the day before you plan to bake. It needs plenty of time in the fridge before rolling out.


Chocolate Babka
Makes a 25-centimeter babka
For the dough:
260 grams plain flour
¼ teaspoon salt
50 grams fine sugar
1 egg
60 grams milk
10 grams fresh yeast (or 5 grams dried)
80 grams butter, softened
Chocolate filling:
70 grams dark chocolate (ideally 60% cocoa solids)
60 grams butter
25 grams icing sugar
10 grams cocoa
¼ teaspoon salt
Syrup:
100 grams sugar
55 grams water
⅛ teaspoon salt
Equipment:
Rolling pin
Offset spatula (optional)
25-centimeter loaf pan
Pastry brush
Place the flour, salt, sugar, and egg in a mixing bowl. In a small saucepan, warm the milk slightly, but don’t let it get hot. Use a whisk to stir the yeast into the milk. Once the yeast has dissolved, pour the mixture into the mixing bowl. Use your hand to mix everything together, squeezing and pressing until all the dry bits are incorporated into a ball of dough. Transfer to a clean work surface and knead for five minutes (set a timer).
Add the butter gradually, a dessertspoon at a time. Don’t add more butter until the previous bit is fully incorporated and no sticky dough remains on the counter surface. Once all the butter is incorporated into the dough, knead for another 4–5 minutes, or until the dough can stretch so thinly that light shines through it. The dough should be elastic but not sticky.
Form the dough into a ball and place into an oiled bowl or Tupperware container. Cover and allow to rise for 1–1½ hours. It won’t rise much. Without knocking the dough back, place the bowl in the fridge and leave it overnight.
The filling should be prepared in advance so it’s fully cooled. Melt the chocolate and butter together in a small saucepan over very low heat. Sift together the icing sugar, cocoa, and salt, and mix them into the chocolate and butter until very smooth. Transfer to a bowl or Tupperware container and set aside at room temperature until completely cool, or overnight. It should be firm but spreadable.
Grease a 25-centimeter loaf pan, then line with baking paper. Dust a clean surface with flour and roll the dough out to a rectangle, around 38 by 28 centimeters. As you look at it, the long sides should be horizontal; the short, vertical. Use an offset spatula (or an ordinary spatula) to spread the chocolate mixture over the surface of the dough, leaving a centimeter border all the way around the edge. Starting at the top long edge, roll the dough up towards you, forming a long log, then place on a chopping board, seam side down.
Use a long, sharp knife to cut down the middle lengthwise. With the inside facing upwards, place the two halves next to each other and pinch the top tapered ends together. Twist the two pieces around each other, forming a helix shape. Place in the prepared loaf tin, tucking the tapered ends to the underside. Cover loosely with a sheet of cling film (it shouldn’t touch the dough) and leave in a warm place to rise for 1–1½ hours. It will only rise by about 15–20%
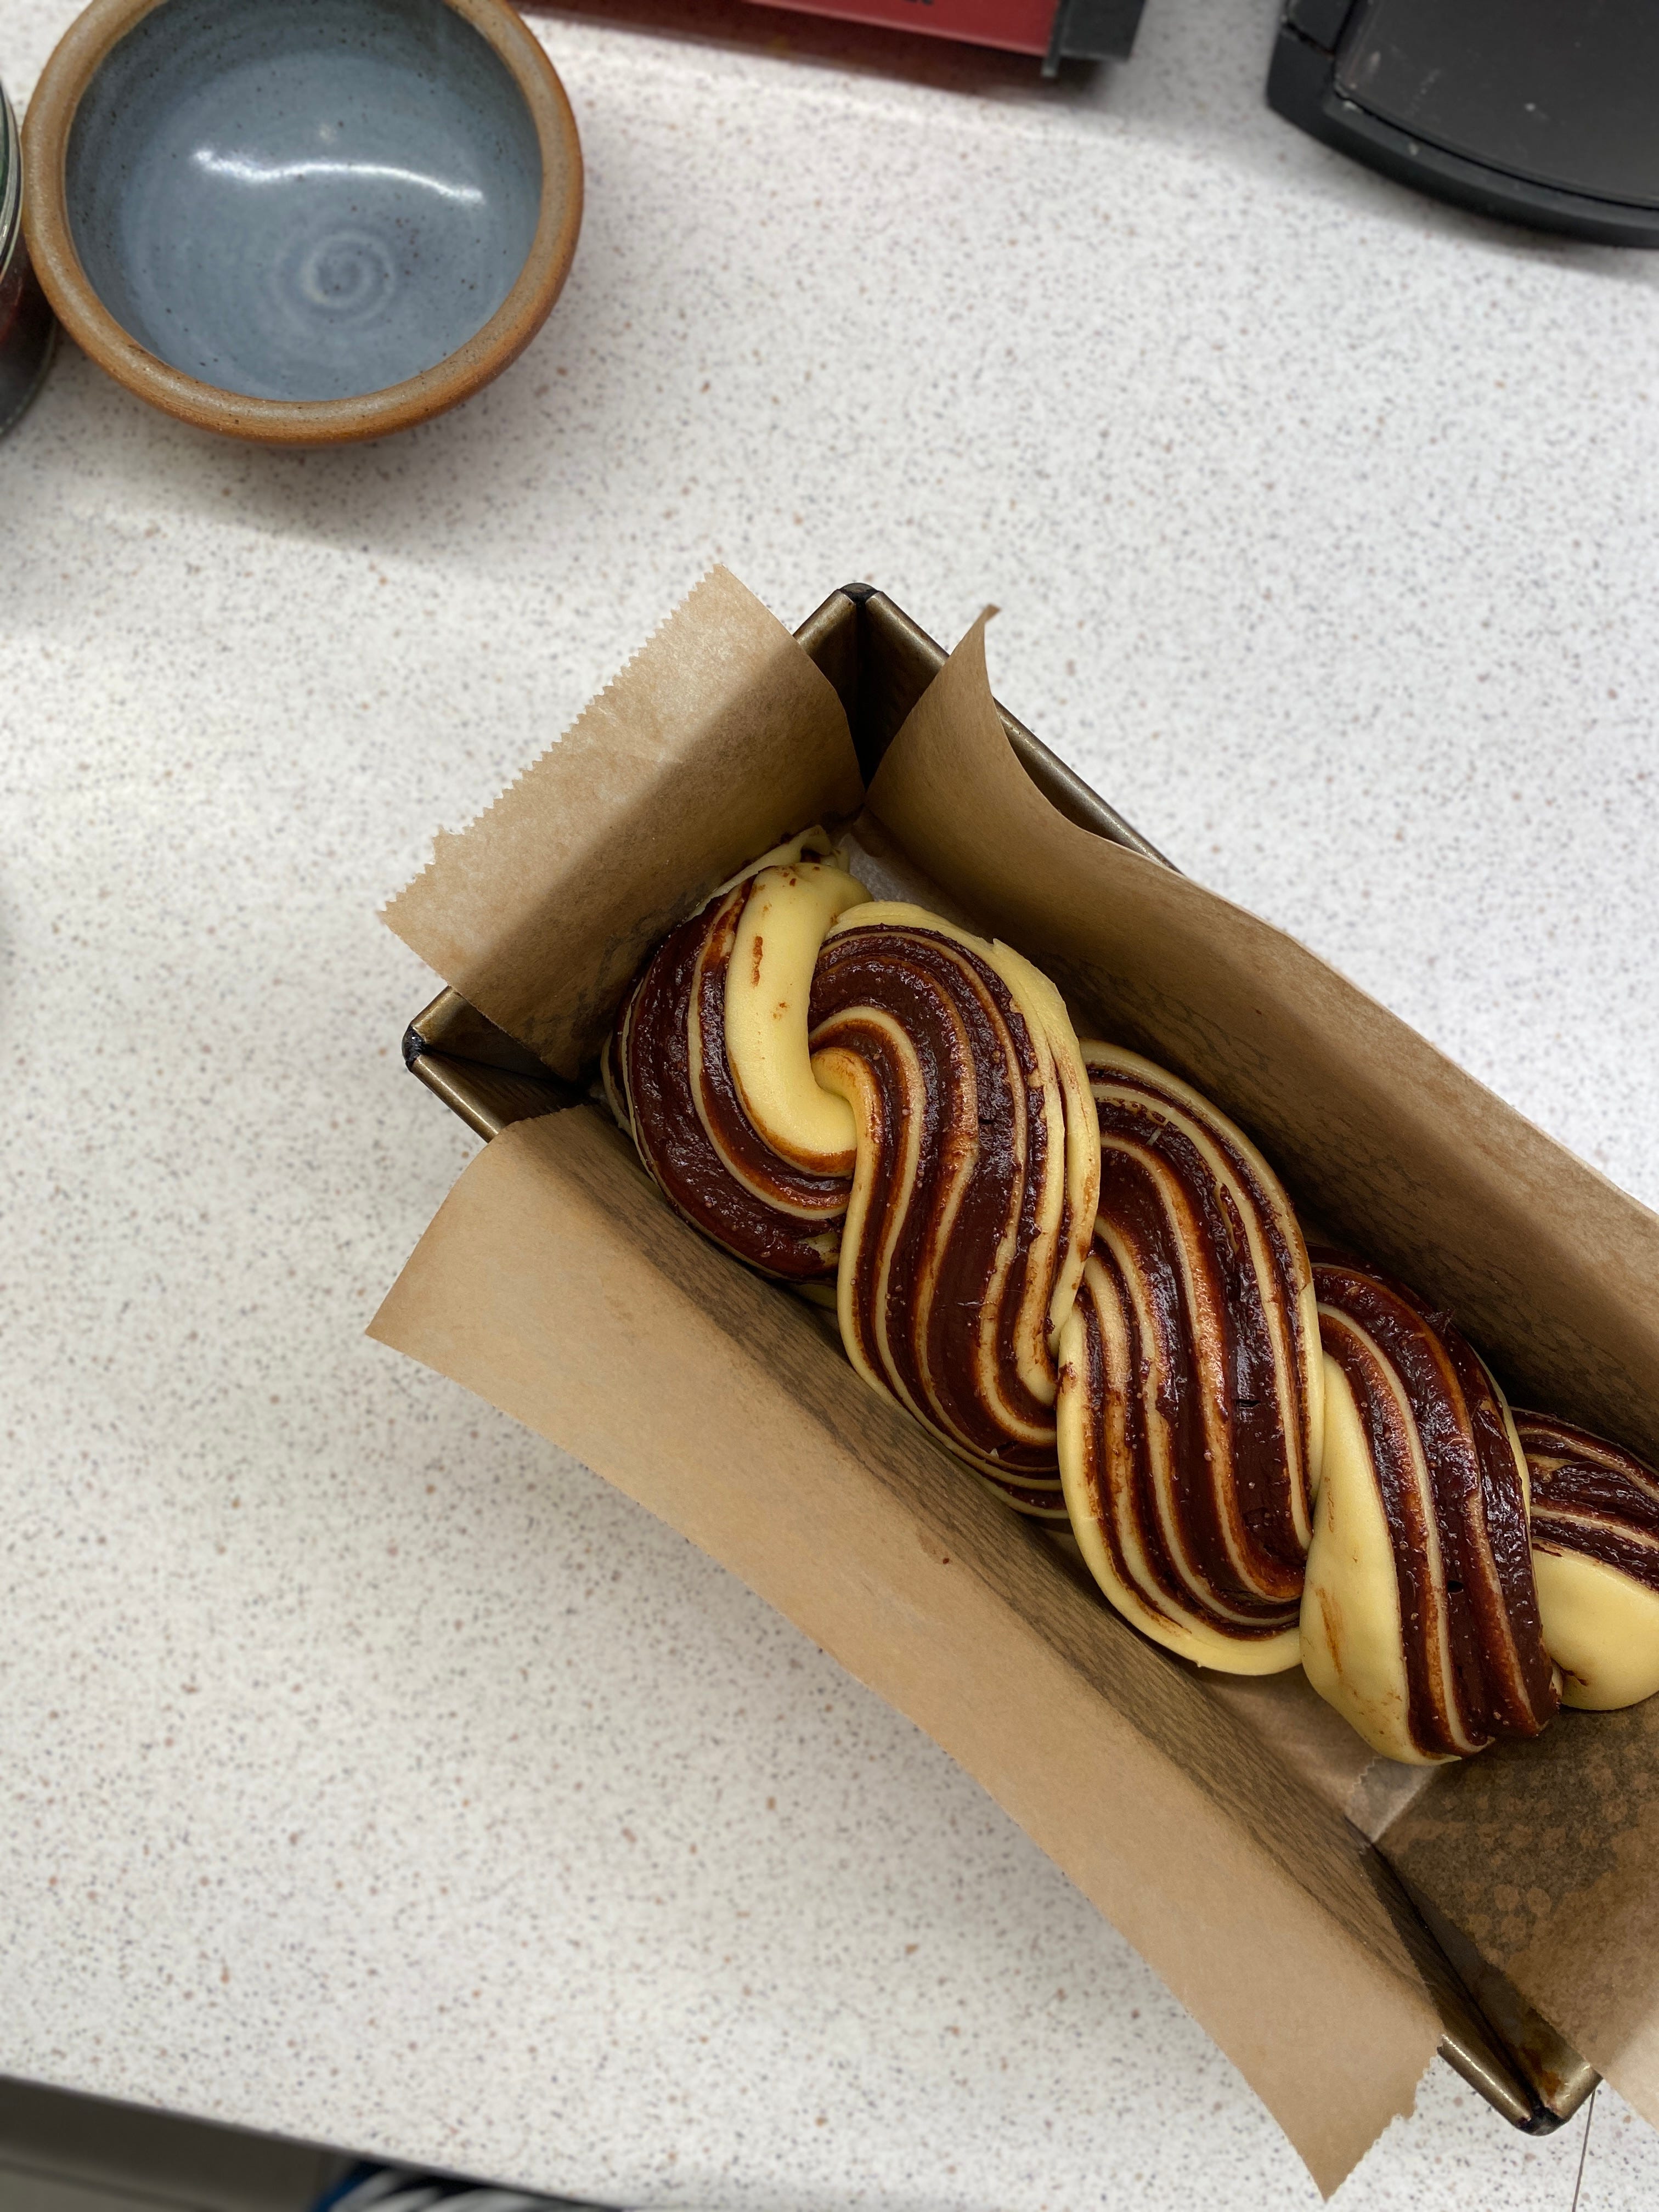
.
Bake in the oven at 190°C (with fan) for 35–40 minutes. Check the babka after 30 minutes, and if it’s browning too much, cover with some foil for the remaining time. A skewer can be inserted to check if it’s done. It will likely have a little sticky chocolate on it when you pull it out, but there shouldn’t be any dough. The babka should feel springy but firm to the touch. You can also use a thermometer to check the internal temperature. You want it to be at least 80°C in the middle.
Make the syrup while the babka bakes. Add the sugar, water, and salt to a saucepan and set over high heat. Bring to the boil. Once the sugar has dissolved, immediately remove from the heat—don’t let it reduce. Allow it to cool while the babka bakes.
Using a pastry brush, brush the babka with the syrup until you’ve used it up. Allow to cool in the tin for 15–30 minutes before removing, then transfer to a cooling rack. Don’t slice it while it’s hot, or the texture will be gummy.
Looks absolutely sublime. (Ant and Deck though? Ruth!)
Always something sweet in your kitchen… can I come and live with you please! x